

Time for a nozzle change?
Not really needed as the original CETUS2 nozzle is still doing just fine. But it is permanent and can not be removed from the extruder.
But, CETUS2 shipped me the new extruder with the replaceable nozzle! Gotta take it for a spin and a few hundred prints (or more).
The new extruder is setting on the bed in the lead picture. It is EXACTLY the same as the original except for nozzle. Take original extruder off. Put new extruder in its place.
 |
 |
| New replaceable nozzle and extruder | Closeup nozzle view |
 |
 |
| Original permanent nozzle | Nozzle replacement parts. |
What struck me, was the size of the new nozzle as compared to the original. It’s not noticeably longer. but sure is a lot wider. It is because of the large holding nut which makes it removable.
Only a very small portion of the actual nozzle tip protrudes beyond the nut. There is a photo of the actual nozzle components. The retaining nut, the two bore nozzle and a thin copper gasket that is place at the entrance to the replaceable tip.
Not mentioned to me by Jason Wu, is I believe the mass of the large nut will provide an added “heat reservoir” at the very tip of the nozzle that will certainly help keep filament flow temps even.
The heat chambers are the two barrel shapes above the V of the nozzle mount. So the heat source is quite far from the nozzle tip.
Many other brand nozzles adopt this wide shape for just this reason. There are pros and cons to every nozzle shape. But they all work and are designed for their their intended purpose.
It’s now a bit more difficult to see the actual flow at the nozzle tip when printing, but I can deal with that. Remember this nozzle is like no other in 3D printing. Mixing at the very tip.
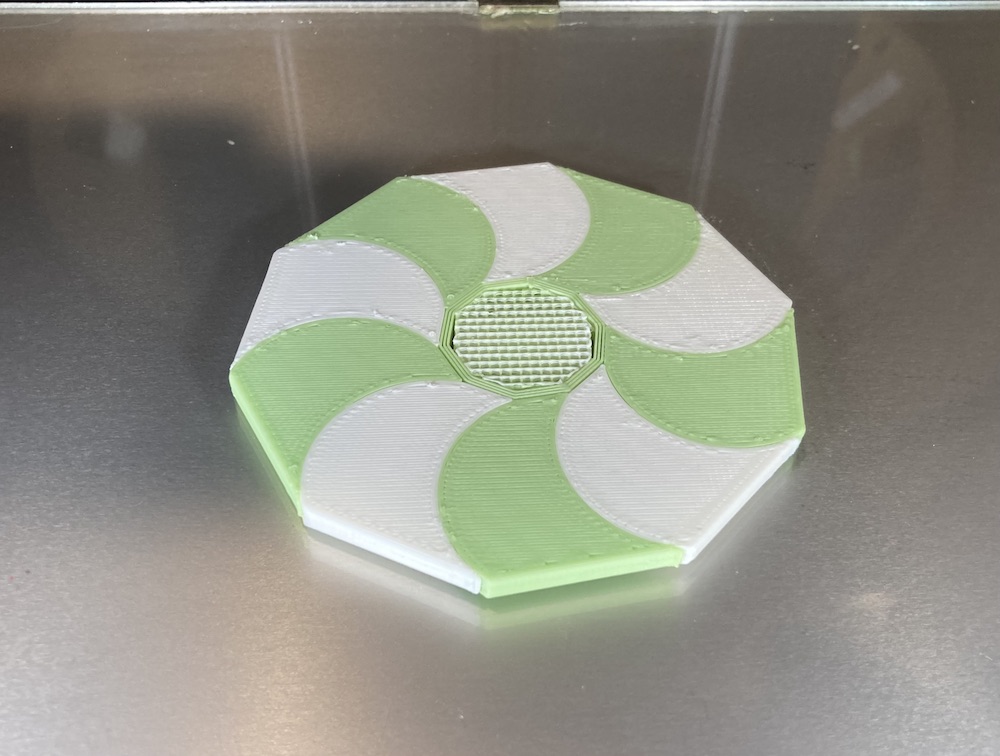
The first few prints I have made tell me nothing was lost in the fast purge on color change. In fact it seems to be faster. I need more testing to be sure,
I had to do a total reset on the leveling but that is a given on any nozzle or extruder change.
The few prints so far are still excellent quality. The first print shown on the left is a bit over temp. The middle print, I just did a no purge tower (shadow purge) print and can not find where the purges occurred. The tag was a nozzle #3 50/50 blend.
All prints shown from this point on, will be with the new extruder/nozzle combo.
 |
 |
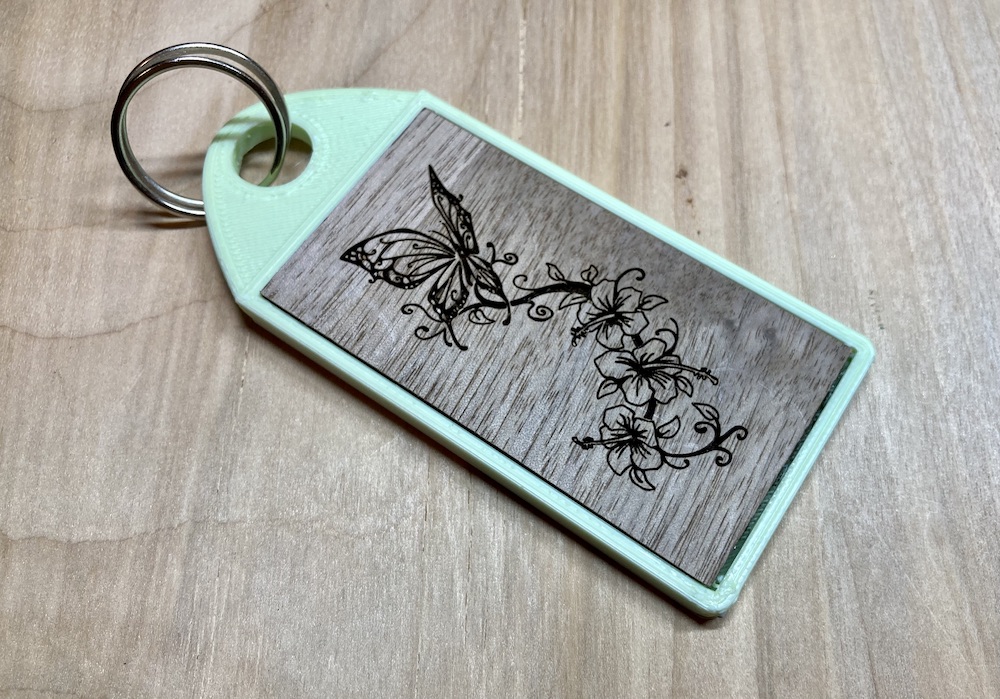 |
| Purge tower center | Shadow purge (No Tower) | 50/50 mix - LASER on Walnut |