- Details
- Category: Original Design
- Hits: 877
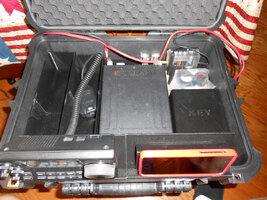
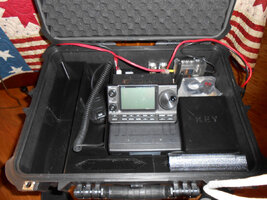
 I made a series of container boxes for a ham radio buddy. He needed them for his “go-kit”. A rapid deployment case containing a portable radio and everything needed to put a short wave station on the air from remote locations.
He enjoys operating radio from federal and state parks. I assume almost any established park qualifies for POTA (Parks On The Air) Its a good reason to pack up ones radio gear and go operate from a remote location.
Everything needed packed into one case makes certain nothing is missing or forgotten. It’s why the case is called the “go-kit”.
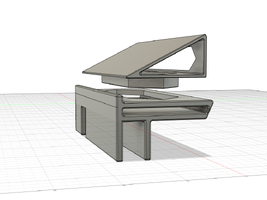
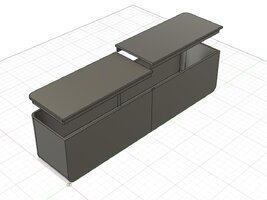
What I designed and 3D printed are organizer boxes and special brackets to hold radio gear for travel and help position gear when operating.
Black was the color of choice and I had several spools of that color PLA (PolyLactic Acid) on hand.
I created three container boxes with removable lids and several mounting brackets and adapters for holding radios and video screens in operating position.
It all worked well for a couple of weeks but then I received a report that the plastic boxes were all warping out of shape. The Go-Kit is stored in the trunk of the car and evidently the Texas heat has encouraged the container boxes to take on strange new shapes.
The boxes are fairly large and I originally designed them with 3mm thick bottoms, tops and side walls to save space and weight. I didn’t consider storage in a hot automobile trunk.
Walls that thin should have been designed with ribs and gussets to resist warping. But that would have greatly reduced internal space. The equipment brackets are designed much heavier and ARE well ribbed and braced. No problems at all with the supports warping. Just the warping with the thin walled boxes.
I experimented with ASA and ABS plastic for the replacement boxes. Both materials warp excessively during test printing. I discovered I can not print the size boxes needed with either ASA or ABS.
I made another test print with PLA+ which is a new higher temperature PLA with much less tendency to warp. 225C print on a 70C build plate. I am now reprinting all the boxes with 5mm walls and double print +45/-45 degree infill pattern. Twice the previous infill and very high rigidity. A real strong and true honey-comb infill. More than double the amount of PLA+ for the same size boxes. They are also twice the weight. Can’t escape that when warp-free results are required.
Print time is also nearly doubled as well. But that is not an issue. It is what it is.
There is a very small loss of useable storage space with the thicker walls and that too is of little concern. I had to be very careful in the re-design where I could “steal space” for the added wall thickness. The packing case did not get any bigger, so the container boxes had to lose some internal volume.
Only one container box had a critical inside dimension. The one labeled "KEY" that holds the paddle key for morse-code sending. There was space to expand that case on the exterior dimension.
Lesson learned here. Sometimes one cannot think of all the factors when creating a new design. It was a learning experience that will not be lost in future designs and revisions.

- Details
- Category: Original Design
- Hits: 919
The CRAFT of 3D printing is NOT in the printing.
Running the print machine is a skill. CNC (Computer Neumeric Control) takes the creativity out of machine operation. Pressing RUN is not much of a skill.
Machine operation IS a very technical skill, with lots of variables that need to be observed and corrections made (usiually in the g-code) to obtain a satisfactory print. Usually stopping the printing operation and starting over with corrective g-code. These corrective edits are a skill that improves with time and experience. .
The true creative effort is displayed in the design and use of CAD (Computer Assisted Design) skills.
Beginners do need to print "other peoples Junque." It's fun to see the machine operate.
However, to become a true craft, I consider original design to be the actual and only CRAFT in 3D (hobbyist) printing.
Simple 3D CAD software exists and some of them are free. Search "Free CAD" for examples. No need to list here. I don't have a recomendation on free software..
Personally, I have several purchased versions of 3D CAD sofware. All were obtained well before my interest in 3D Printing. Autodesk, Vectric, Rhinoceros, DeskProto, and several others are installed in my computers. Fusion360 (Autodesk) is usually my go-to 3D print CAD,
My "Quick Thought" is, "Start designing and printing ORIGINAL work." Then explore CRAFTing ideas with colors, assemblies, blends, and the thousands of variables possible with 3D printing. But... that's just my opinion. DO (or print) whatever is fun for YOU! ~Dan
- Details
- Category: Original Design
- Hits: 955
Moving On
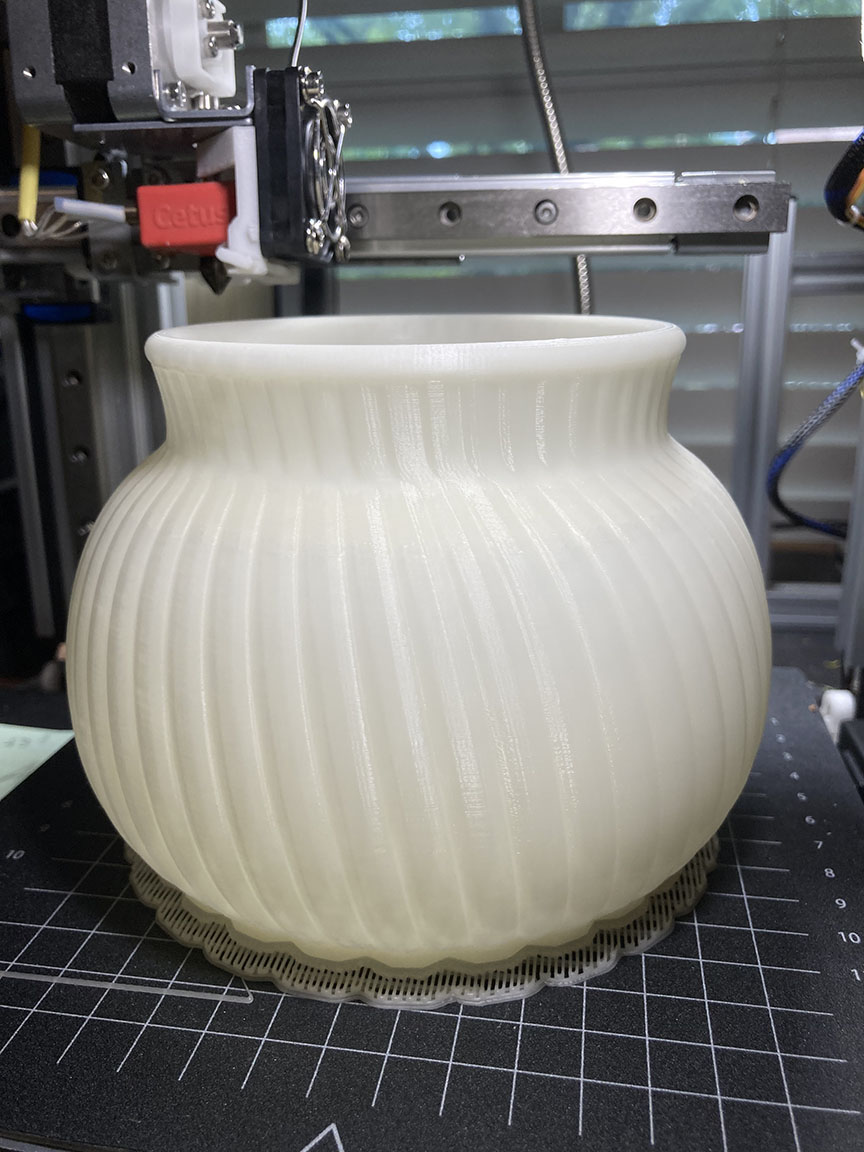 181 grams, 20 hour print, 0.15mm layer heightAfter the learning experience of additive manufacturing making plastic Junque designed by other people, I asked myself, “What’s in the process for me?”
I admit it was the technology and the low cost equipment that first drew me in. I am a techno-type person attracted to complex operations.
My spouse declared before I had my first piece of 3D printing hardware. “I don’t believe you haven’t started 3D printing” She knows me well after 57 years of companionship.
I was aware of the process many years earlier but hadn’t realized there was a new breed of lightweight and low cost “hobbyist” hardware available. I was hooked and permitted to engage. She lit the fuse.
Nine printers later, I pause to contemplate. One thing stands out is the amount of plastic I have processed into “stuff”. Making stuff is what it is all about. Learning how to do it was the initial motivation.
It soon became apparent, most of the stuff is what I started calling plastic “Junque”. How many plastic skulls does the average person need?
I quickly tired of printing “other peoples” designs. The real creative juices flow when I can use 3D CAD software and graphic software like ZBrush to create printed objects of my own design.
Time to move away from Junque making.
I see the 3D print process as a tool. It is not my goal to “get the machine running” to watch it perform. I pretty much have that under control. All CNC is fun to watch. Not a good use of personal time.
The hardware I own and use is not junk (normal spelling). The major weakness is rigidity and capacity. Three dimensional printers need to be rigid and stable as every professional grade CNC machine tool. The bigger the size, the more massive they must become.
I have no desire (at this time) to produce massive 1 piece plastic items. My plan is to use the smaller machines I have to their full capacity when necessary.
Larger prints require longer run times. This has become my standard method of operation. My “moving on” thoughts are to design and produce larger and higher resolution prints. Consuming more raw material. 100 and exceeding 200 gram components not unusual. 12,16, 20 hour print times.
My previous recent posts in this blog are indicative of my “larger is better” printing goals.Moving On
Printing small parts to be assembled into larger items is a very good way to make larger items. I always avoid the mind-set that a product design must be created in a single all-inclusive 3D print.
Nice when it can happen but most large items are component assemblies.
“Moving On” goal is to produce less Junque by concentrating on larger and superior quality items. Not interested in how fast I can print, but generating the highest quality for the purpose.
It’s still plastic but it should be high quality plastic…
- Details
- Category: Original Design
- Hits: 879
What’s the best type 3D printer?
 Latest FDM print designTwo major, three dimensional printer formats exist, with which I am familiar as an owner/user. FDM (Fused Deposition Modeling) and UV cure resins. There are a proliferation of variation with these format names but the process is the same however a manufacture chooses to use a different acronym. It’s creative marketing hype to be “different”.
Commercial Additive manufacturing (a.k.a - 3D Printing) is a totally different “animal” than hobbyist and very small business. Commercial equipment is far beyond the garden variety desktop system for which I speak.
The hobby class manufactures from outside the USA (and their USA distributors) love to spout off how “professional grade” their low cost product compares to others in their class, but it is a sick joke when put up against REAL professional and industrial grade machinery.
OK, not going there in this report.
I associate with the home user / hobbyist. I manufacture but I am not a manufacturer. There is some sense to that. I assure you there are no major manufacturers reading this blog looking for 3D printer and 3D printing pointers.
This story is about how I view the hardware I own and use as far as the difference between FDM and resins. Their differences do NOT make one method the best do-all choice above the other.
A jewelers metal forming hammer does not do the same work as a carpenter’s framing hammer. The only thing in common is they bare both called hammers. This same analogy applies to FDM and Resin 3D printers.
If I want to do both jobs I need two different hammers. Same with 3D printers.
FDM
I have created and printed a lot of “stupid plastic Junque” with my (now numbering 7) FDM printers. FDM, once I got away from printing Junque, is the work-horse for practical plastic products. I can take advantage of the many variants in filament types to make strong things that are practical. Those things may not be heirloom quality family hand-me-downs.
One great advantage is I can print large one-piece items with FDM. (See picture.)
Resin
Resin printers I use are the DLP variety. Not LASER scanners but picture mask full layer projectors. This limits what I can make as far as size. For me it is perfect for personal jewelry size items. What it brings to the 3D printing desk is extremely fine detail resolution not available with FDM. Excellent for highly detailed modeling and masters for jewelry casting models.
Resin prints at the hobbyist material quality level are not good for end use products. Most prints are fragile and resin curing is usually not complete. Painted gaming models, model train (type) display models, lost resin (wax) casting are its strong points. The value is in the superb modeling detail. Not as a durable or functional end use product. (Remember I am referring to hobby class materials here.)
My advice is start with FDM. Then move to resin for the excellent but less durable detail printing.
I am satisfied with that strategy. It works for me. (Your desires may certainly be different.)
I would love to have an application where I could justify an FDM system in the price class of MakerGear and Ultimaker. Or perhaps a resin printer such as B9Creations or Formlabs. My printers are roughly 10% the cost and probably 60% the quality.
Low cost is reflected in the components that just meet the minimum spec to do the job. Higher cost is for superior design and hardware that far exceeds what is minimum. Stability, strength, weight, endurance are reflected in the higher cost to obtain.
“Better” is a relative term. A point of view. Better and best helps a professional perform by reducing working effort and failures caused by pushing and exceeding limits. Perhaps automation reduces effort.
Buying the best tool does not make one the best at what has not been mastered. But the best tools do make the masters into the best professionals at what they can do…
Nothing wrong with buying the best tools to start if possible. Just saying that getting started doesn’t always demand the very best. Like buying a Huffy bike to learn to balance before opting for the full dress Harley.
Got to learn somewhere.
- Details
- Category: Original Design
- Hits: 1136
 My latest flame has been learning how to use my mini LASER engraver. Info on that can be found in the KautzCraft LASER blog. I pulled myself away from the smoke and bright light to do some CAD work. 3D solid design is where I feel the most creative. LASER cutting and engraving is mostly 2D decorative art. Like 3D printing, the LASER can take a lot of time just doing its “thing” under CNC. Time to do other work.
We have been getting more than our share of rain here in Texas. There has been no drought warnings this year. I saw a picture of a design I liked which was a four sided bucket with teardrop openings. I immediately thought of rain drops. So I call my design the “Rain Bucket” However, it will never hold any water.
Not exactly like the inspiration design, I freelanced my version to my dimensions and purpose. My design is to gather the clutter of objects on a desk or shelf or wherever. Design size is 118mm x 118mm x 122mm with 3mm wall thickness. Of course it can be scaled to a size desired.
The rain bucket will print with no support as the rain drop “holes” are designed to not require internal support. The material I used is PLA+ and on my Delta took seven hours to print @ 60 mm/s base speed.
 I have printed another Rain Bucket using a new filament I have been investigating. Its full name is ASA (acrylic styrene acrylonitrile). Just call it ASA. It is a UV resistant plastic material with great thermal and weather properties. Good for outdoor use where UV from sunlight destroys most plastic.
This one is red, and used only about 160 grams off a new kilogram spool. I also have a kilogram of blue (unopened) and about 500 grams of white ASA. ASA prints similar to ABS (Leggo bricks) but has stronger ratings/properties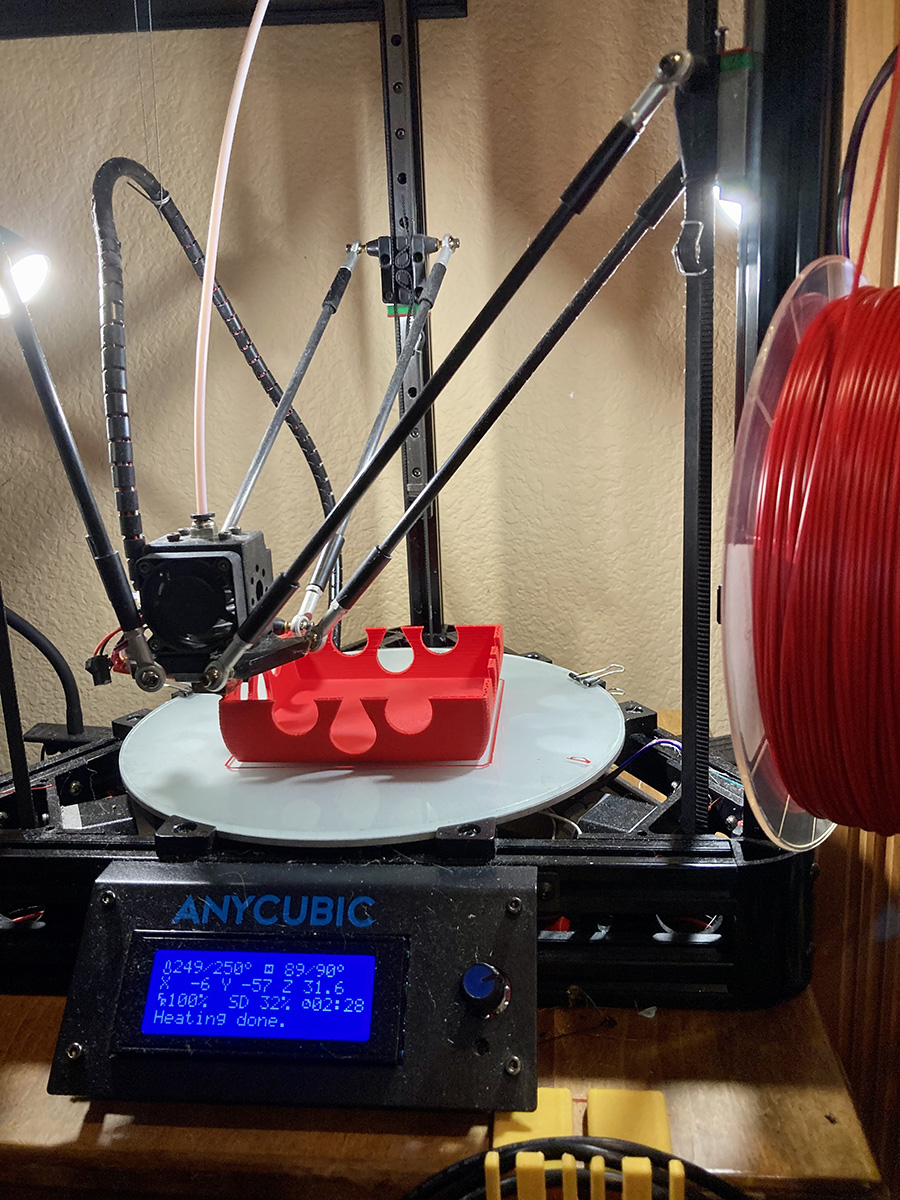
- Details
- Category: Original Design
- Hits: 1122
Dateline: 4/11/21
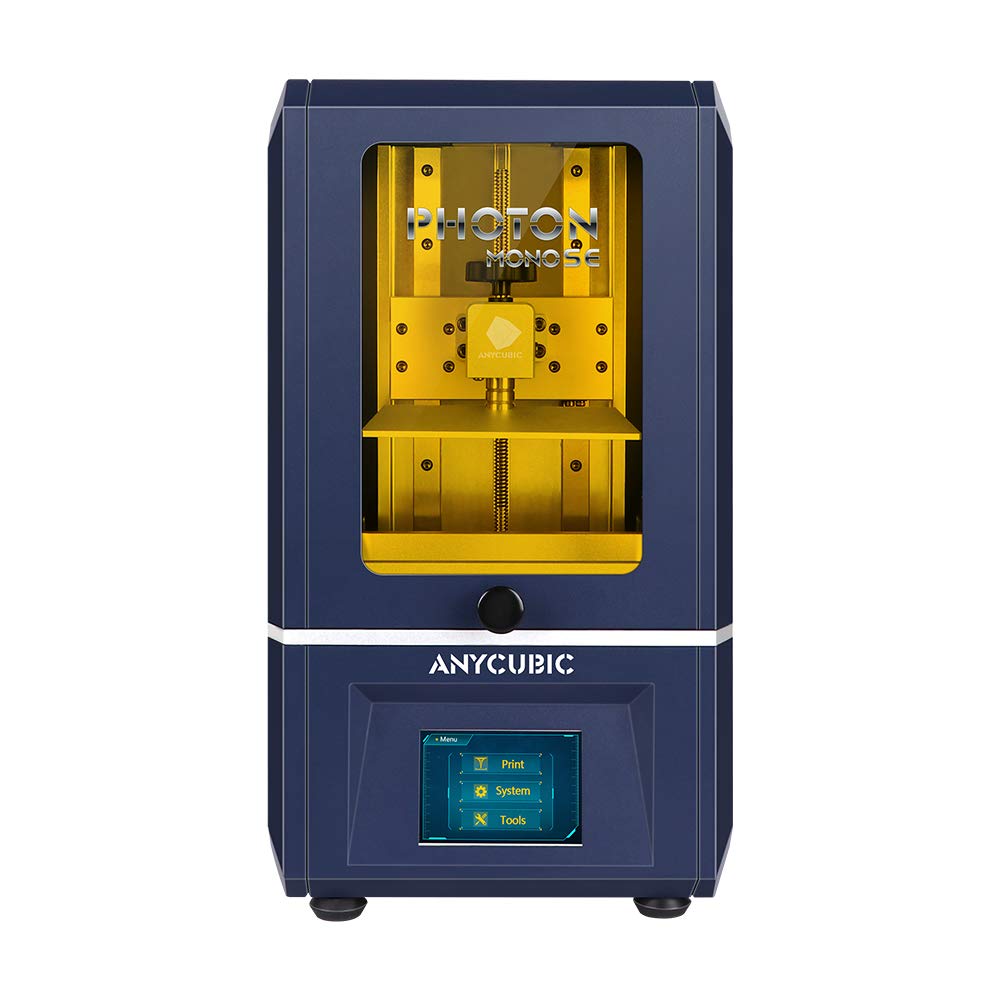 Trying to come up with ideas on what to print with my new MSLA printer. I stated before, number one plan is for printing castable items. That is top of the list. I have not yet accepted the reality… well, yes, I have… that the good castable resin costs about $300 per liter. Standard resins are in the $50/liter range.
It’s just hard to imagine paying out that much for jewelry making. Because I charge far too little for my custom work. Pricing an items’ value is only semi relevant to the cost of the metal such as silver. Gold is a different story. The real cost is ALL the materials consumed in casting and the extreme amount of labor for a hand finished piece.
I have no issue with passing through the cost of production. However, I subsidize myself immensely, as many of my designs are given away as presents by both my spouse and me. That’s not an issue. We do it because we want to. My craft hobby is not intended to put bread on the table.
But recovering materials cost helps keep the hobby going. There is also overhead keeping the books and paying taxes. KautzCraft Studio is a registered business in Texas.
Back to Printing
What this all implies is the product (the jewelry) must be of the highest quality I can produce. If the use of high cost and quality resin is necessary, then it is just a part of the production costs. The finial sell-price and value must be somewhere above the cost of creation.
The MSLA resin printer can produce acceptable jewelry quality (smooth) master models for casting. Lest expensive resins also print well. My issues with lower cost casting resins are with obtaining a clean burnoutof the investment in the kiln. With all the pre-work required before casting, anything lower than a 99% casting yield is not acceptable. I am very close to that expectation when doing lost WAX casting. Wax is figuratively the “gold” standard.
I have a good supply of non-castable resins. I will continue designing items not intended for casting. The type of non-castable resins I have are primarily suited for on the shelf “display” prints. Unsuitable for real world structural applications. Stuff I usually call display “Junque” as it is more suitable for looking at than real durable use.
The resin printing items in the previous post are examples of display only Junque.
A complete set of detailed chess board pieces would be a good example of light to medium duty resin printed objects. One step above fragile display only Junque. There are good uses for MSLA resin printed items. Specialty resins are available for producing strong and durable prints. It is all the makers options of material choice. One size (resin) does not fit all needs.
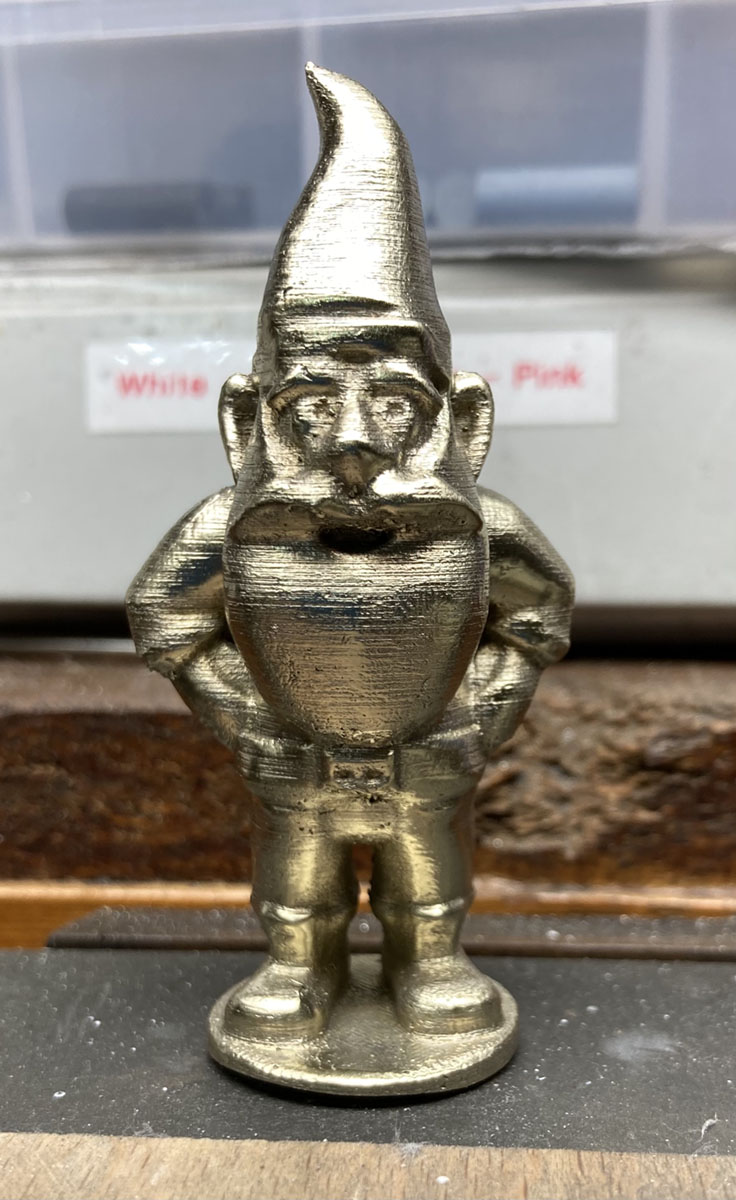 A second crafting Idea I am considering is one step above jewelry casting. I am thinking of small size cast metal collectables. The cast-brass gnome is one of my first examples.
Also considering awards and tokens. Things cast of metal are far higher intrinsic value than the plastic original model of the same item.
My thinking is that a 3D printed item can be utilized as the master model in a quality casting, produced by the lost (wax/resin) process. I see 3D printed item used as an intermediate step rather than the finished product.
My home residential workshop is not suitable for any large-scale foundry-type casting. I live in a HOA residential neighborhood and a back yard foundry would not receive approval by the HOA-STASI Estate Security Ministry. It is my choice to live here
Of course, this is not the only way 3D printing is presently being used. The only limitation is imagination and suitability of purpose. Three-dimensional printing is not suitable for every end use item. I think about all the options.
Perhaps I could switch to a cast gold standard. The cost of gold will certainly keep the projects and cast items small. I wonder if solid gold is as popular in these times as silver. The items made will certainly have to pay their way into creation. Gold can be plated to a base metal. Yet another process to investigate. I am not headed in that direction at this time.
My Next Step
 So what’s next? Whatever I find interesting. I have some professional grade 3D CAD and 3D Graphic software with which I can design almost anything. Pixologic ZBrush is a drawing tool with which I desire to become far more capable. I have used it many times for editing 3D models. Next step is “from scratch” creation of 3D printable models. I will get there as I have already printed a few (very) crude attempts.
ZBrush is a complicated professional level 3D drawing tool. I will get better with practice. So, “what’s next” for me is practice to become more masterful with ZBrush. It is a very good alternative to formal 3D CAD. The organic form in ZBrush is usually more important than exact geometric dimensional accuracy. However, dimensions are not absent in organic drawing, and precise scale can be maintained.
I think I have made this same “next step” ZBrush decision before. That’s OK. I don’t chastise myself for changes to plan. Life is too short. A plan is just that, a direction to take at a certain point in time. Personal plans can change without pain if I am the only one affected with the change. That’s a freedom of personal choice. If my free will has no effect on others, there are no issues to anyone but myself. I can live with that.
Where have I put that drawing pad… ??
- Details
- Category: Original Design
- Hits: 1211
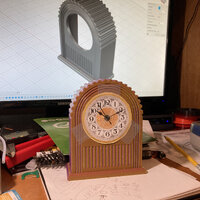
 Original designI was kicking back wondering what kind of Three-Dimensional Print project I could design before Christmas 2020. Time is getting short. Whoa! Did I just think about time?
Some folks design and print the operating parts of a CLOCK. But usually, the 3D hobby printing process is a bit crude for fine gear work. I wasn’t thinking of the operational parts inside the clock. I am thinking about the case that contains the clock and the face where the time is displayed.
The display could be old fashioned round analog dial or digital. I can and probably will design cases for both systems. Analog has a traditional appeal for me.
I figured there were probably dozens of makers of the actual clock mechanisms. A look on Amazon.com proved that was an accurate assumption.
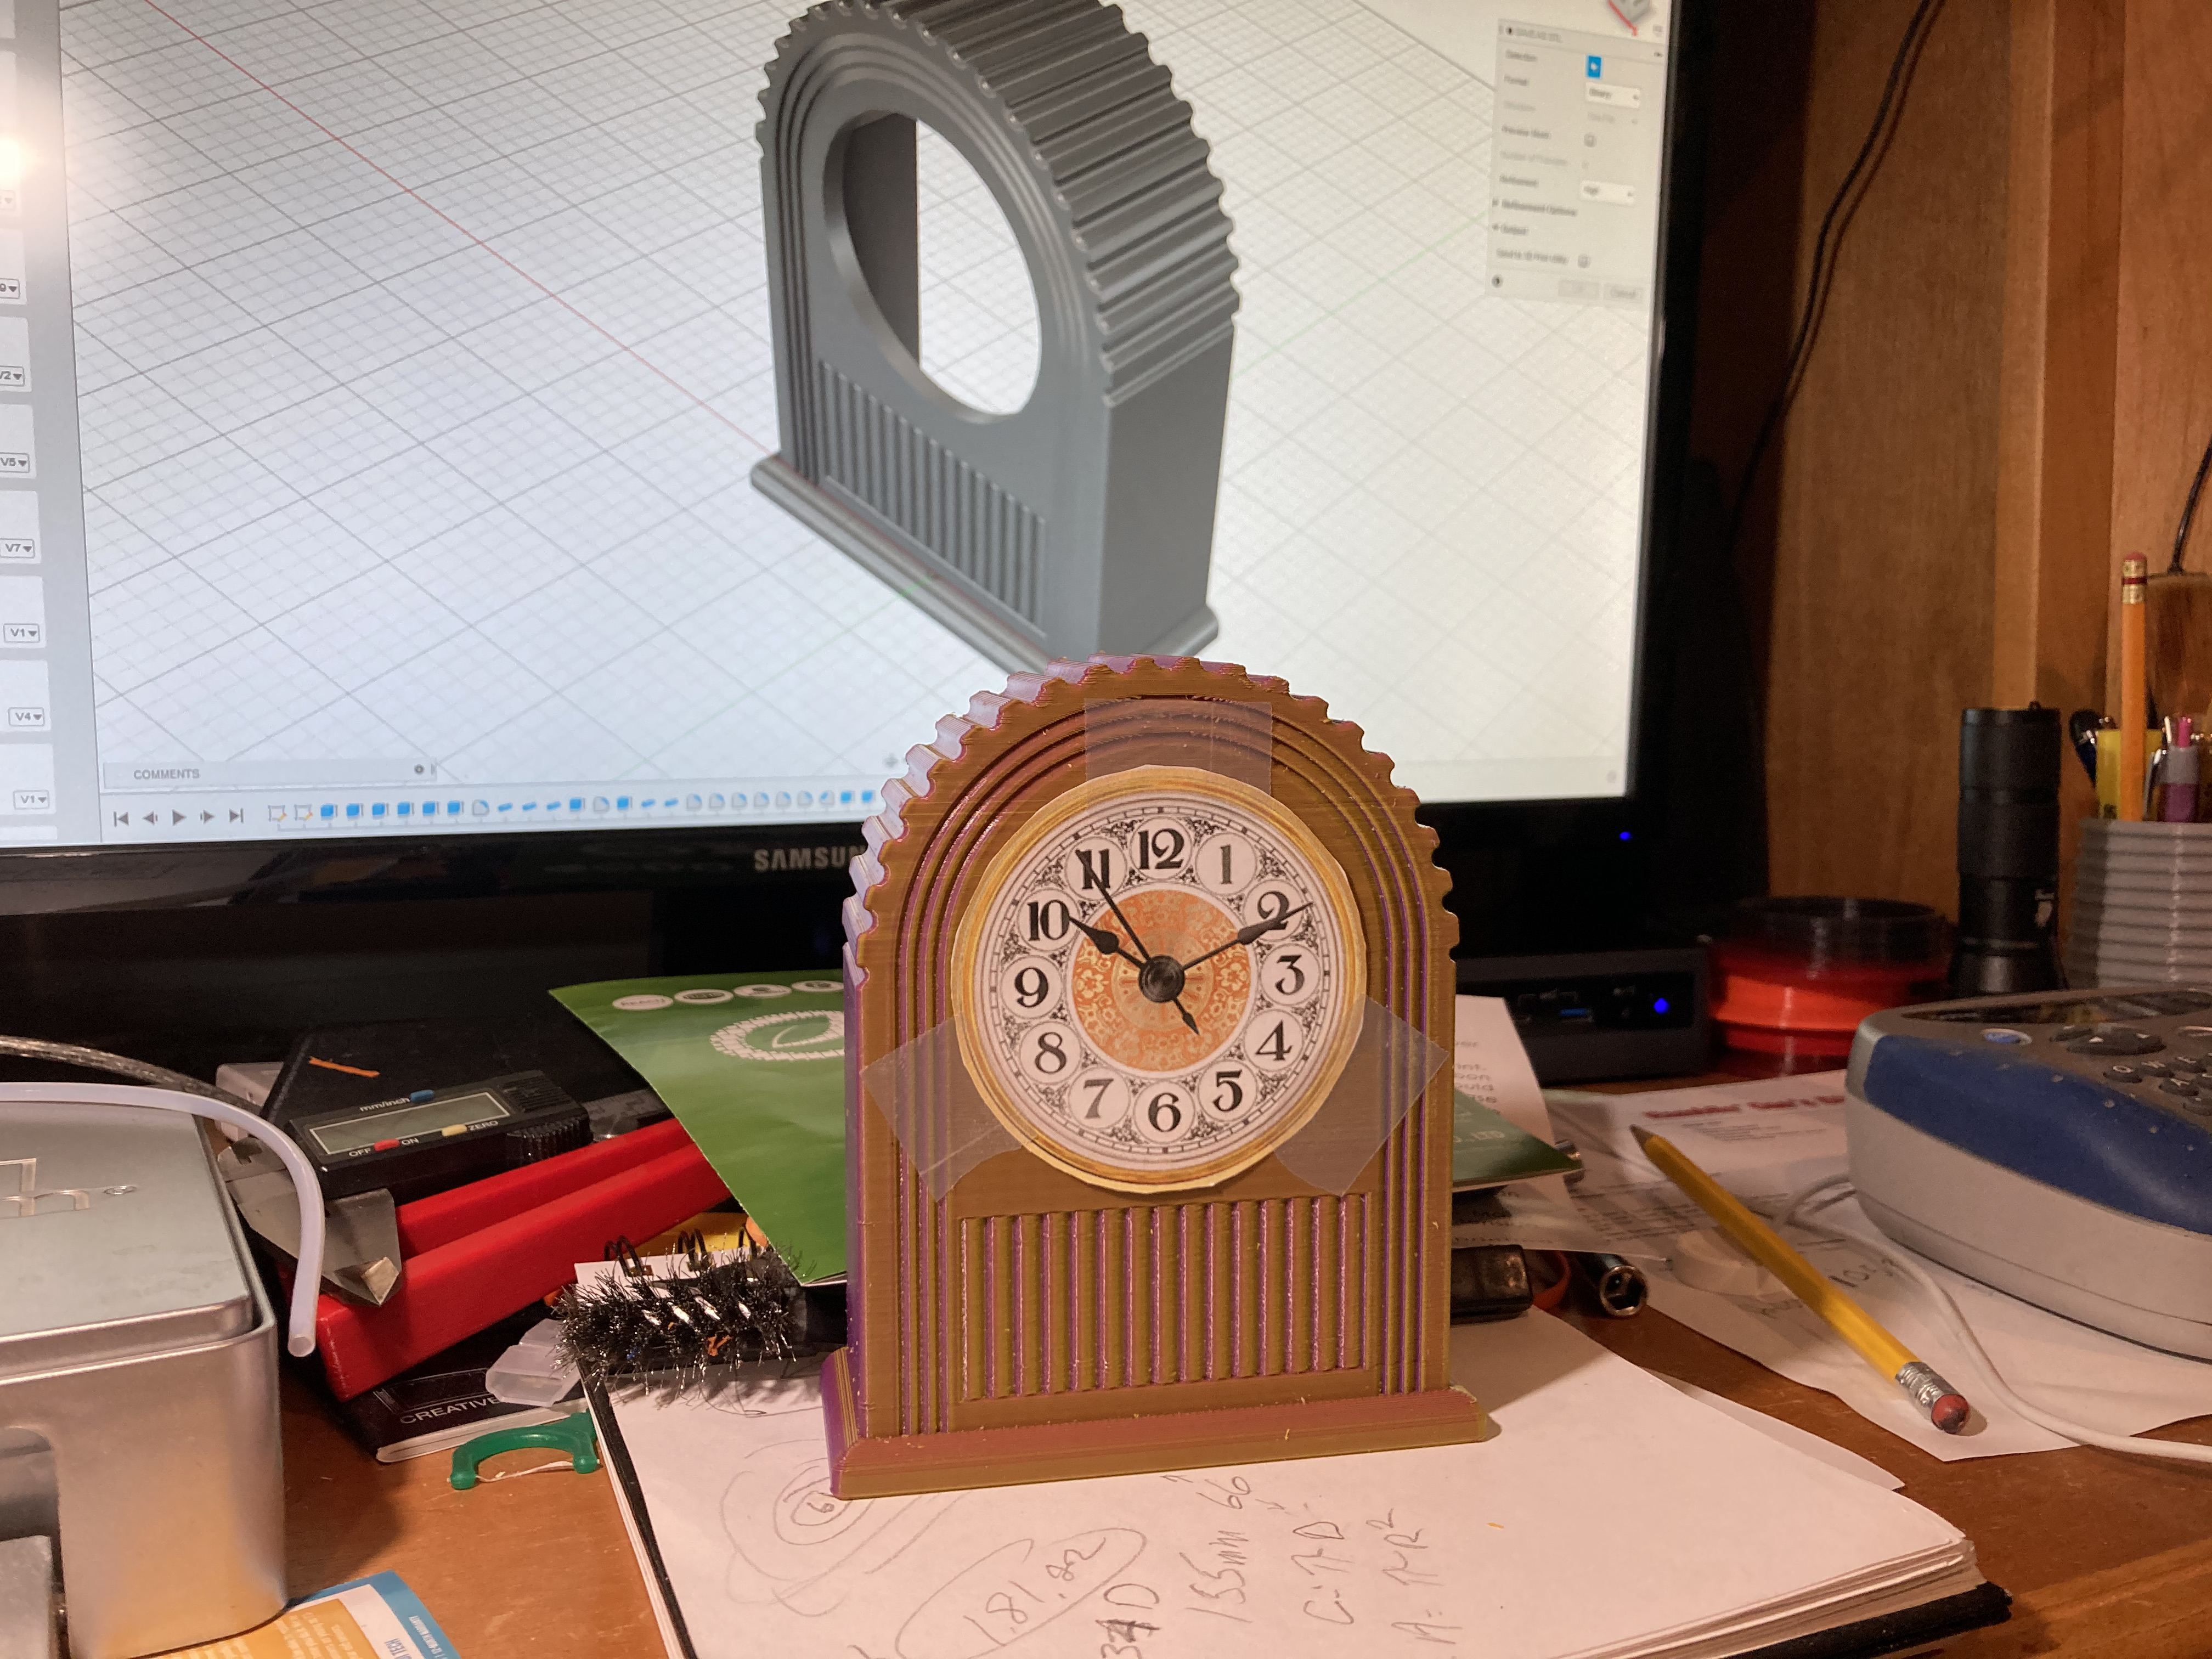
I wanted something for a small case that would be easy to print on one of my smaller 3D printers. I found a series of 70mm analog clocks that simply press fit into a 61mm round opening. Woodworkers use these clock “works” in their wooden-made cases. Certainly, a perfect choice for a 3D Printed case.
I made a few pencil sketches then I fired up my favorite 3D CAD, Autodesk Fusion 360. In short order, I had my design drawn in CAD and out-put to an STL file. The STL file is fed to another computer program, Simplify3D. There it is sliced into hundreds of layers for 3D printing. A new file called G-Code is created by Simplify3D, which is sent to yet another computer in the 3D printer. It’s the G-Code that instructs all the actions the printer performs to make a 3D print.
I have printed five of my original design and purchased clock “works” for all of them. The actual clock (from Amazon.com) is in the $10-$15 range. They are gifts for friends and family.
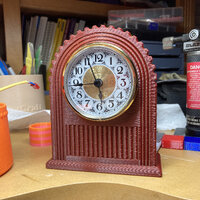
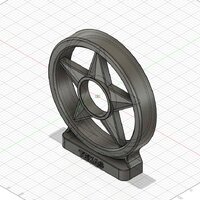
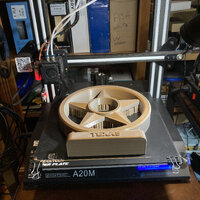
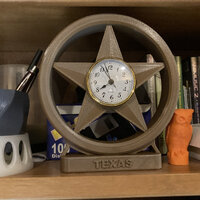
I then got really ambitious about clock cases and designed a larger clock for myself. It uses the same “works” as the other clocks. My inspiration was the Texas “Lone Star” logo. This clock maxed out the build surface on my two-color printer.
All but one of my new small clocks were printed blending two colors of plastic in a two-color single nozzle printer. The Lone Star clock is also two-color print using a 50/50 mix of beige and brown. It required 17 hour 15 minutes to print. I almost ran out of brown filament.
I love the design stage and the 3D CAD as much, probably more than the printing. The creative is in the design drawing and how the computer variables are set to cause the printer to do exactly what the creator / artist desires.
It’s very technical but if you know me, it’s right up my ally. The actual printing is the results of a lot of advance preparation. A 3D printer is simply an output tool. Same as a text printer. Both printers need the proper input before they produce text or a 3D object.
Hope you find my “time machine” creation story, interesting.